
A Complete Guide to Ghost Mannequin Photography and Invisible Mannequin Editing
The Hollow Man Effect, also commonly known as the ghost mannequin effect or invisible mannequin technique, has revolutionized product photography in the e-commerce industry. This powerful post-production method creates the illusion of clothing worn by an invisible person, displaying garments in a three-dimensional, realistic form without the distraction of visible models or mannequins. By seamlessly combining multiple photographs, photographers and editors can showcase apparel with professional polish while keeping costs manageable.
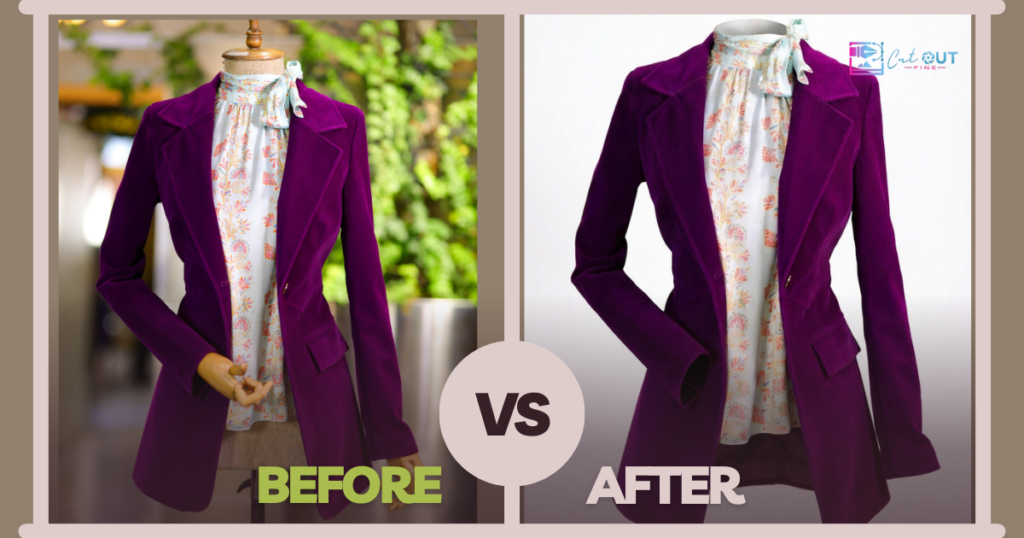
Professional ghost mannequin services like those offered by Cutout Fine have made this technique accessible to businesses of all sizes, offering expert editing that transforms basic product photos into stunning, conversion-optimized images.
In this comprehensive guide, explore everything you need to know about the Hollow Man Effect, from understanding the terminology to mastering the creation process and leveraging its benefits for your online business.
Understanding the Terminology
Before diving into the technical aspects, essential to understand the various terms used interchangeably within the industry. While they all refer to similar techniques, each term emphasizes different aspects of the same fundamental concept.
Hollow Man Effect
This is the most descriptive term that captures the essence of the technique creating a hollow appearance where clothing appears to be worn by an invisible figure. The effect creates depth and dimension while maintaining the garment natural shape as if draped on a human body.
Ghost Mannequin Effect
This term emphasizes the disappearing act of the mannequin itself. Through post-production editing, the physical mannequin used during photography becomes invisible in the final image, leaving only the beautifully shaped garment behind.
Invisible Mannequin
This term can refer to both the physical mannequins used during photography (typically transparent or modular plastic forms with removable parts) and the digital outcome where the mannequin becomes invisible in the final edited photograph.
Ghost Mannequin Service
This refers to professional photo editing services specializing in creating the ghost mannequin effect. These services typically handle the entire post-production workflow, including image masking, compositing, joint editing for areas like necks and sleeves, shadow creation, and final retouching for a seamless hollow appearance.
Remove Mannequin / Hollow Man Retouching
These terms specifically describe the core editing process: using image manipulation software like Adobe Photoshop to remove the mannequin from photographs through techniques like masking, selection tools, background removal, and layer compositing. Photo retouching also includes refinements such as wrinkle removal, color correction, and shadow enhancement.
What Makes the Hollow Man Effect Different?
The Hollow Man Effect stands apart from other product photography methods in several significant ways, making it the preferred choice for many e-commerce businesses. According to recent product photography trends in 2026, the hollow man technique continues to dominate as the go-to solution for apparel presentation.
Comparison with Flat Lay Photography
Flat lay photography, where garments are arranged on a flat surface and photographed from above, has its place in product catalogs. However, it fails to convey the three-dimensional shape, drape, and fit of clothing. The Hollow Man Effect solves this limitation by showing how garments naturally hang and form to a body, giving customers a much better understanding of the product actual appearance when worn.
Comparison with Live Model Photography
While live models provide the most realistic representation of how clothing looks when worn, they come with significant drawbacks. Model photography is expensive, requiring hiring talent, makeup artists, and potentially stylists. Even with headshot photo editing, models can inadvertently draw attention away from the product itself, with customers focusing on the model appearance rather than the garment. The Hollow Man Effect eliminates these concerns while maintaining the dimensional benefits of seeing clothing on a form.
Why E-Commerce Businesses Use the Hollow Man Effect
The adoption of the Hollow Man Effect across the e-commerce industry isn’t coincidental; it delivers measurable benefits that directly impact business success.
Enhanced Customer Visualization
Studies have shown that product images using the Hollow Man Effect can boost conversion rates by an average of 32%. When customers can clearly see the shape, fit, and drape of a garment on an implied body form, they gain confidence in their purchasing decision. This three-dimensional presentation helps shoppers visualize themselves wearing the item, reducing uncertainty and return rates.
Cost-Effectiveness
Compared to hiring professional models for every product shoot, the Hollow Man Effect offers substantial cost savings. Professional editing services typically charge around $0.50 to $2.00 per image, making it an economical choice for businesses with large product catalogs. In fact, you can try a free trial to test the quality before committing to bulk orders. The initial investment in a quality mannequin and basic photography equipment pays dividends over time.
Product-Focused Presentation
By eliminating the human element, the Hollow Man Effect ensures that customer attention remains solely on the product. There are no distractions from model features, expressions, or styling choices that might not resonate with all viewers. The garment becomes the star of the image.
Consistency Across Product Lines
Using mannequins of standardized sizes creates visual consistency across an entire product catalog. Every item is presented from similar angles with uniform lighting and positioning, giving your online store a polished, professional appearance that builds brand credibility.
Versatility for Various Garments
The technique works exceptionally well for shirts, blouses, dresses, jackets, hoodies, and other apparel that benefits from showing interior details like collars, necklines, and sleeve construction. For products requiring detailed isolation, clipping path services and multi-clipping path techniques work seamlessly with ghost mannequin editing to create pixel-perfect results.
Step-by-Step Creation Process
Creating professional Hollow Man Effect images involves two main phases: photography setup and post-production editing. Success depends on careful execution in both stages.
Phase 1: Photography Setup
Equipment Needed:
- White or neutral-colored static mannequin with removable parts (neck, torso sections)
- Professional camera or high-quality smartphone camera
- Consistent lighting setup (softboxes or natural light with diffusers)
- White seamless backdrop paper or fabric
- Tripod for camera stability
- Foam board or supporting structures for insert shots
Main Photography Steps:
- Dress the mannequin: Carefully dress the mannequin in the garment, ensuring proper fit and smooth fabric without excessive wrinkles. Pin or clip the back if necessary to achieve the desired front appearance.
- Set up consistent lighting: Position lights at 45-degree angles to the mannequin to minimize harsh shadows. Use the same lighting configuration for all shots to ensure consistency.
- Capture main views: Photograph the front, back, and side views of the garment on the mannequin. Use a telephoto lens at chest or hip height to avoid distortion. Keep the camera position consistent.
- Take insert shots: These are critical for the hollow effect. Either turn the garment inside-out and photograph the interior (especially collar, neckline, and sleeve openings), or use foam board placed inside the garment to support and photograph hidden areas. Keep the same lighting and camera settings.
Pro Photography Tips:
- Shoot in RAW format for maximum editing flexibility
- Use manual camera settings to maintain consistency across all shots
- Ensure the mannequin size matches the garment for proper fit representation
- Take multiple shots of each angle for backup options
Phase 2: Post-Production Editing
This is where the magic happens. Post-production transforms your mannequin photographs into professional hollow man images. While the process can be done manually in Adobe Photoshop, many businesses choose to outsource this step to specialized ghost mannequin services for efficiency and consistency. Professional services handle everything from basic background removal to complex image masking and compositing.
Detailed Editing Steps:
- Import and organize: Open your main garment image and insert shots in Adobe Photoshop. Create a clean white background layer as your foundation.
- Select and mask the garment: Use the Quick Selection Tool, Pen Tool, or Magic Wand to carefully select the garment while excluding the mannequin. Refine the selection edges using the Select and Mask feature to ensure clean, realistic borders. This step requires precision around collar edges, sleeve openings, and hems.
- Create layer mask: Convert your selection to a layer mask, effectively removing the mannequin from view while preserving the garment.
- Prepare insert layers: Open your inside-out or interior shots. Select and mask these elements in the same way, focusing on areas that will be visible in the hollow interior (collar, neck opening, sleeve interiors).
- Composite layers: Drag the insert layer beneath the main garment layer. Use the Transform tool (Edit > Transform > Scale, Rotate, Warp) to precisely align the insert with the garment opening. The collar edge from the insert should match perfectly with the main garment’s neck opening.
- Blend and refine: Use the Eraser Tool with soft edges or additional layer masks to blend overlapping areas seamlessly. Pay special attention to ensuring no visible lines or mismatches between layers.
- Add depth with shadows: Create natural-looking shadows inside the garment hollow using the Burn Tool or by painting with a soft black brush on a new layer set to Multiply blend mode at 20-40% opacity. Professional shadow creation services can ensure shadows appear inside the collar, along fold lines, and in sleeve interiors with photorealistic accuracy.
- Perform final retouching: Remove wrinkles using the Clone Stamp Tool or Healing Brush. Apply color correction with adjustment layers if needed, and ensure the background is pure white using Levels or Curves adjustments. Complete photo retouching ensures every detail is polished and professional.
- Export for web: Flatten your image and export as a high-quality JPEG or PNG file optimized for web use, typically at 72 DPI with appropriate dimensions for your e-commerce platform.
Quick Reference Guide
The following table summarizes the key steps, actions required, and tools needed for each phase of creating the Hollow Man Effect:
| Step | Key Action | Tools Needed |
|---|---|---|
| Shoot Main Views | Front, back, and side shots on mannequin | Camera, tripod, lights, white backdrop |
| Capture Inserts | Inside-out shots or foam board support | Same setup for consistency |
| Composite | Layer images and create masks | Photoshop masks, Refine Edge tool |
| Refine | Add shadows, remove wrinkles | Clone Stamp, Brush, Burn Tool |
Benefits and Best Practices
Key Benefits for E-Commerce
- Professional appearance: Creates a uniform, high-quality look across your entire product catalog, enhancing perceived brand value.
- Cost-effective scaling: At approximately $0.50 to $2.00 per image through professional services, you can maintain consistent quality while processing hundreds or thousands of products.
- Increased conversion rates: Studies show up to 32% improvement in conversion rates compared to flat lay photography.
- Reduced return rates: Better product visualization leads to more informed purchase decisions and fewer returns.
- Faster production: No need to coordinate model schedules, makeup artists, or extensive styling—just dress the mannequin and shoot.
Essential Best Practices
- Invest in quality mannequins: Choose mannequins with smooth surfaces and removable parts specifically designed for photography. Modular mannequins with detachable neck pieces and torso sections make capturing insert shots much easier.
- Maintain lighting consistency: Document your lighting setup with photos and measurements. Use the same configuration for all product shots to ensure uniform appearance across your catalog.
- Use telephoto lenses: Shoot at chest or hip height with a telephoto lens (85mm or longer) to minimize perspective distortion. This keeps the garment proportions accurate and professional-looking.
- Ensure proper mannequin sizing: The mannequin should match the target size for each garment. Ill-fitting clothing looks unprofessional and doesn’t accurately represent how the product will fit customers.
- Plan your shots meticulously: Before starting post-production, ensure all insert shots align with the main shots in terms of lighting, angle, and scale. Mismatches are difficult to correct in editing.
- Consider outsourcing for scale: If you have hundreds of products to edit, professional services like Cutout Fine offer batch consistency and can handle large volumes efficiently while freeing your team to focus on other tasks.
- Test and iterate: Start with a few test products to refine your process before scaling up. Each garment type may require slightly different approaches for optimal results.
Common Challenges and Solutions
Challenge: Visible seams between composite layers
Solution: Use the Clone Stamp Tool with a soft brush and low opacity to blend edges. Work in small increments and sample from nearby areas to maintain texture consistency. The Healing Brush can also help blend transitions naturally. Professional photo retouching services excel at creating seamless composites.
Challenge: Unnatural-looking shadows or lack of depth
Solution: Study how light naturally falls on fabric. Add shadows gradually using the Burn Tool at 15-25% exposure, building up darker areas in multiple passes. Expert shadow creation techniques create shadow layers with black brushes set to Multiply blend mode for more control and photorealistic results.
Challenge: Maintaining color accuracy across edits
Solution: Use adjustment layers rather than direct color changes. Create color reference swatches from the original images and check against them throughout editing. Professional color correction services ensure perfect color consistency. Calibrate your monitor regularly for accurate color representation.
Challenge: Time-consuming editing for large product catalogs
Solution: Create Photoshop actions to automate repetitive steps like background removal and color correction. For large volumes, partner with professional services that specialize in batch processing while maintaining quality. Many services offer free trials to test their workflow integration.
Advanced Techniques
Once you’ve mastered the basics, these advanced techniques can elevate your Hollow Man Effect images to the next level:
Multiple Angle Compositing
For complex garments like jackets or dresses with intricate details, shoot from multiple angles and composite 3-4 different views. This allows you to show both the exterior styling and interior construction in a single comprehensive image. Advanced multi clipping path techniques help isolate different garment components for precise editing.
Subtle Wrinkle Enhancement
While you want to remove obvious wrinkles and creases, maintaining subtle fabric texture makes the image more realistic. Use the Dodge and Burn tools at very low opacity to enhance natural fabric folds that add dimension without looking messy.
Dynamic Shadow Placement
Instead of uniform shadows, create varied shadow depths based on fabric weight and drape. Heavier fabrics cast deeper shadows in fold areas, while lighter materials have softer, more diffused shadows. This attention to detail significantly enhances realism.
Color Grading for Brand Consistency
Apply subtle color grading using adjustment layers to ensure all product images share a cohesive color palette that aligns with your brand identity. This creates a unified visual language across your entire e-commerce store.
Specialized Product Editing
For high-end products beyond apparel, techniques like jewelry retouching can be combined with hollow man techniques for accessories displayed with clothing. This creates cohesive product presentations that showcase complete outfits.
Getting Started: Your Implementation Roadmap
Ready to implement the Hollow Man Effect for your e-commerce business? Follow this roadmap for success:
- Assess your needs: Determine how many product images you need to create monthly and whether in-house editing or outsourcing makes more sense for your business model.
- Test professional services: Before investing in equipment and training, try a free trial with a professional service to understand the quality standards and turnaround times available. This helps you make informed decisions about your workflow.
- Acquire equipment: Invest in at least one quality mannequin in your most common size, basic lighting equipment, and a camera or smartphone capable of high-resolution photography.
- Set up your photography space: Designate a consistent shooting area with controlled lighting. Document your setup for repeatability.
- Practice with test products: Start with 5-10 items to develop your workflow, test lighting, and refine your editing technique before processing your entire catalog.
- Develop or outsource editing: Either invest time in learning Photoshop techniques through tutorials and practice, or research and select a reliable provider offering comprehensive services including clipping path, image masking, and ghost mannequin editing.
- Create workflow documentation: Document your entire process, from photography settings to editing steps, ensuring consistency and making it easier to train team members.
- Monitor and optimize: Track conversion rates and customer feedback after implementing Hollow Man Effect images. Continuously refine your approach based on results and stay current with product photography trends.
Conclusion
The Hollow Man Effect represents a powerful intersection of artistic photography and practical e-commerce needs. By creating the illusion of garments worn by an invisible form, this technique gives online shoppers the dimensional product view they need to make confident purchase decisions, while keeping costs manageable for businesses of all sizes.
Whether you call it the Hollow Man Effect, ghost mannequin technique, or invisible mannequin photography, the fundamental goal remains the same: presenting clothing products in their best light while maintaining focus on the garment itself. The combination of careful photography and skilled post-production editing creates images that are both beautiful and functional, directly contributing to improved conversion rates and reduced return rates.
Success with the Hollow Man Effect doesn’t require perfection from day one. Start with the basics, focus on consistency, and gradually refine your technique. Whether you choose to handle editing in-house or partner with professional services like Cutout Fine, the investment in quality product imagery pays dividends through enhanced customer trust, increased sales, and a more professional brand presence. With comprehensive services ranging from basic background removal to advanced photo retouching, professional editing partners can help you achieve consistent, high-quality results at scale.
As e-commerce continues to evolve, the Hollow Man Effect remains a timeless technique that bridges the gap between online shopping and the tactile experience of seeing clothing in three-dimensional form. By mastering this approach, you position your business to compete effectively in the increasingly visual world of online retail.
Related Resources and Services
To deepen your understanding and access professional services for the Hollow Man Effect, explore these resources:
Professional Editing Services:
- Ghost Mannequin Service – Professional hollow man effect editing
- Clipping Path Service – Precise product isolation and cutouts
- Background Removal – Clean, professional white backgrounds
- Image Masking – Advanced selection for complex edges
- Shadow Creation – Natural shadow effects for depth
- Color Correction – Accurate color representation
- Photo Retouching – Professional finishing touches
- Multi Clipping Path – Complex product editing with multiple selections
Specialized Services:
- Jewelry Retouching – Specialized editing for jewelry and accessories
- Headshot Photo Editing – Professional portrait retouching
Getting Started:
- Free Trial – Test professional editing services risk-free
- Product Photography Trends in 2026 – Stay current with industry best practices
For more information about professional photo editing services and to explore how the Hollow Man Effect can transform your e-commerce business, visit Cutout Fine.
___
About This Guide
This comprehensive guide covers all aspects of the Hollow Man Effect, including terminology, techniques, benefits, and best practices for e-commerce product photography. Whether you’re new to product photography or looking to refine your existing process, this resource provides the foundation for creating professional, conversion-optimized product images. For professional editing services, visit Cutout Fine.
